When developing plugins with Local by Flywheel it’s a good idea to keep the plugin code separate from your WordPress installs. Using symlinks with Local by Flywheel helps keep the plugin code isolated so it’s easier to manage.
Since Local by Flywheel uses containers for each site, you can symlink, or symbolically link, a directory into your install.
What Are Symlinks?
A symlink is basically just a redirection—it’s the exact same thing as a folder or program alias.
When you create an alias (sometimes seen as “shortcut”), any time you click on it to open, your computer just redirects you to the source and opens the folder or program you created the alias from.
When you symlink a directory into Local’s install, it just sees the contents of the linked folder. It doesn’t care about the location of the original folder because your computer is automatically redirecting it.
We can use these to keep our plugin code separate from our WordPress install.
Download & Configure Volumes Add-on
If you are not using Local Lightning (Flywheels latest version of Local), you’ll need to download this plugin so you can map directories to your site’s container.
If you are using Local Lightning, skip this section—it only applies to the older version.
The older version of Local runs all of it’s containers inside of a virtual machine which makes the symlink process complicated. So the plugin was created to handle all the linking for you.
Once you download the plugin, upload it into Local to install it and you’ll see a new “More” tab that contains a “Volumes” link under the site name.
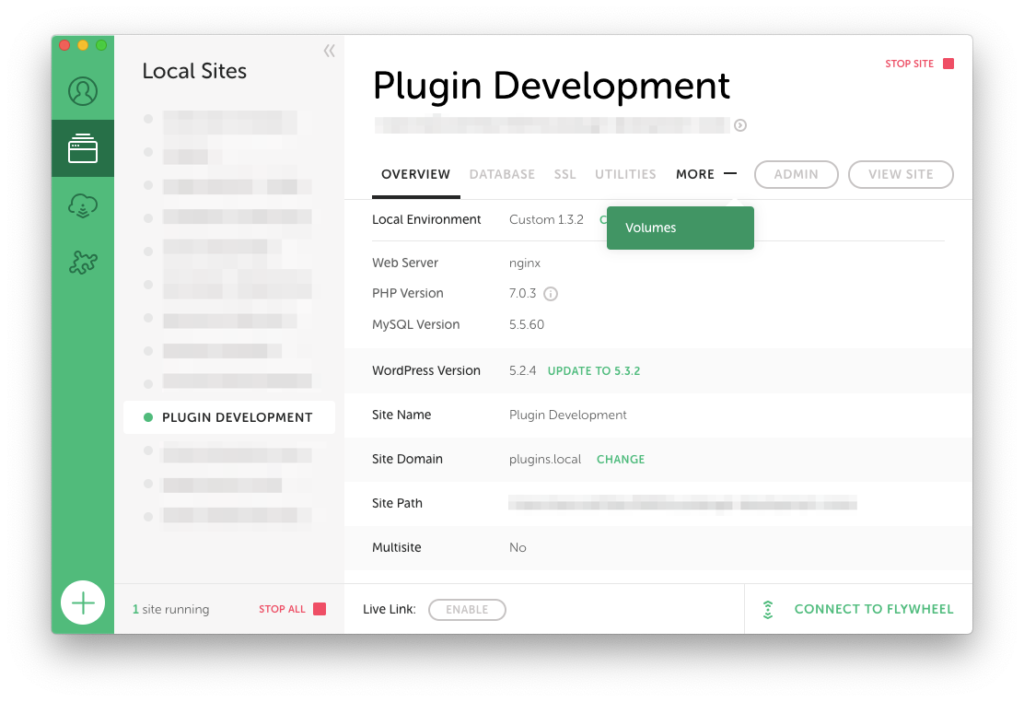
Open the Volumes tab and you’ll see a list of directories that are being symlinked. Scroll to the bottom and add your plugin folder.
Make sure that you select the plugins root folder (where your main plugin file is) when you’re adding the “Host Source”.
Then add the destination:
/app/public/wp-content/plugins/{PLUGIN-NAME}
Once you click “Remap Volumes” you’ll be all set. Now when you make changes to your plugin files, they’ll automatically update in your local WordPress install.
NOTE: Never, ever update your plugin from the WordPress admin. Since WordPress removes and re-adds the plugin it’ll delete all the files inside your linked plugin directory. If you have lots of build files and configuration files that you don’t include in your plugin, it will definitely ruin your day.
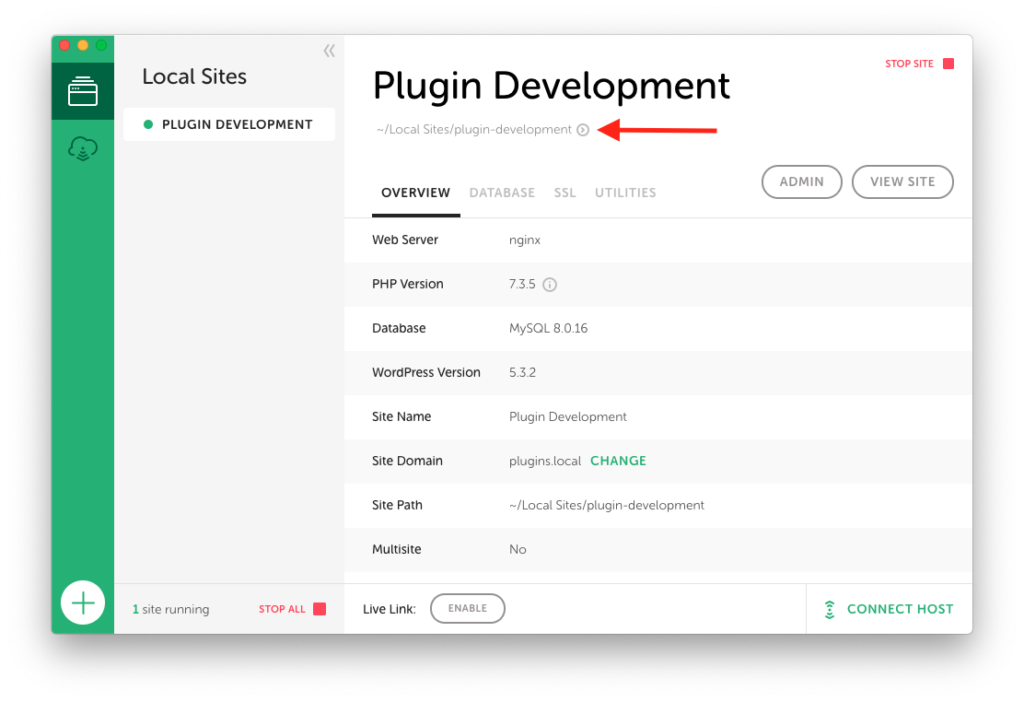
Using Symlinks With Local Lightning
If you’re using the newest version of Local (“Local Lightning”) then you don’t need a plugin to use symlinks with Local by Flywheel.
Once you have your site set up and configured, open the site directory by clicking the circled “>” at the top.
Now open terminal and we’ll use the symlink command: ln -s
Note: if you want to learn more about any command in the terminal, you can type man before it and look at the documentation. Looking up the manual for ln, you would type man ln and be able to see all the options and how to use it.
Also open up the folder containing your plugin files. Then use the command to link your plugin folder with the plugin directory:
ln -s /path/to/original/plugin/folder /path/to/local/wp-content/plugins/{PLUGIN-NAME}This command will create a new folder inside Local’s install, but the contents of the folder will actually be your plugin folder.
Now you can keep your plugin code separate from your local WordPress install.
Resources
How to Use Local by Flywheel for Local WordPress Development
CSS-Tricks | Symbolic Links for Easier Multi-Folder Local Development