In this issue, I’m going to walk you through adding a Github Action to your WordPress Plugin.
Github actions are tools to help you automate parts of your development process.
Actions help automate repetitive tasks so you can focus on more important development.
Unfortunately, a lot of plugin developers don’t know how to automate the right tasks. They spend too much time on tedious tasks that drain motivation.
Development turns into a chore rather than the joy it started with.
Outsource the tedious tasks to Github Actions and spend time where it matters
Here’s a few tasks that can be automated:
- Running tests on the codebase to verify everything is working as intended
- Closing stale Pull Requests that haven’t had comments in X weeks
- Identifying code quality issues in submitted pull requests
- Publishing new versions to the WordPress Repository
Creating any of these will save you hours of work over the next few months.
For example, I helped Michelle set up a deployment action for her plugin recently. She used to spend hours trying to figure out the deployment process any time she wanted to push out a new update.
Here’s how you can add your own for deploying to the WordPress Repository.
Step 1: Create a .github directory and add your workflow file
In the root of your plugin, create a new .github directory and add a new yaml file within a workflows directory. Here’s what that folder structure looks like (it must be set up exactly like this):
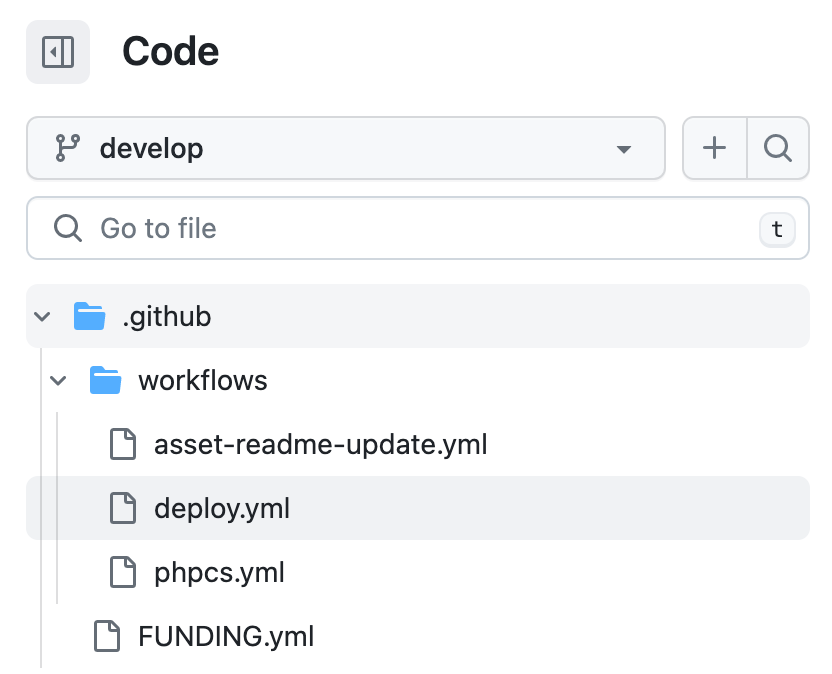
Github knows that .yml files in this directory are actions. They’ll start showing up in the Actions tab of your plugin’s repository.
Step 2: Add the necessary steps in the deployment action file
First, add the name of the action—it’s displayed in the actions tab in your repository.
# The name of the Github Action that displays in github.com/<username>/<repo>/actions
name: Deploy to WordPress.org Repository
Next, we need to define when you want your action to run. Since this is deploying to the WordPress repository, we only want it to run on new published releases:
on:
  release:
    # run only when a new release is published, but not when it's classified as a pre-release.
    types: [released]
Finally, add the job that will run and actually deploy your plugin to WordPress.org
jobs:
deploy:
name: Deploy to WP.org
runs-on: ubuntu-latest
steps:
- name: Checkout code
uses: actions/checkout@v2
# Using 10up's deployment action, we deploy our plugin to the WordPress repository.
# You can view that action here: <https://github.com/10up/action-wordpress-plugin-deploy>
- name: WordPress Plugin Deploy
uses: 10up/action-wordpress-plugin-deploy@stable
# Here, we are using action secrets SVN_USERNAME, SVN_PASSWORD, and PLUGIN_SLUG which
# authenticate with WordPress and lets the action deploy our plugin to the repository.
#
# To learn more about setting and using secrets with Github Actions, check out: <https://docs.github.com/en/actions/security-guides/encrypted-secrets?tool=webui#about-encrypted-secrets>
env:
SVN_USERNAME: ${{ secrets.SVN_USERNAME }}
SVN_PASSWORD: ${{ secrets.SVN_PASSWORD }}
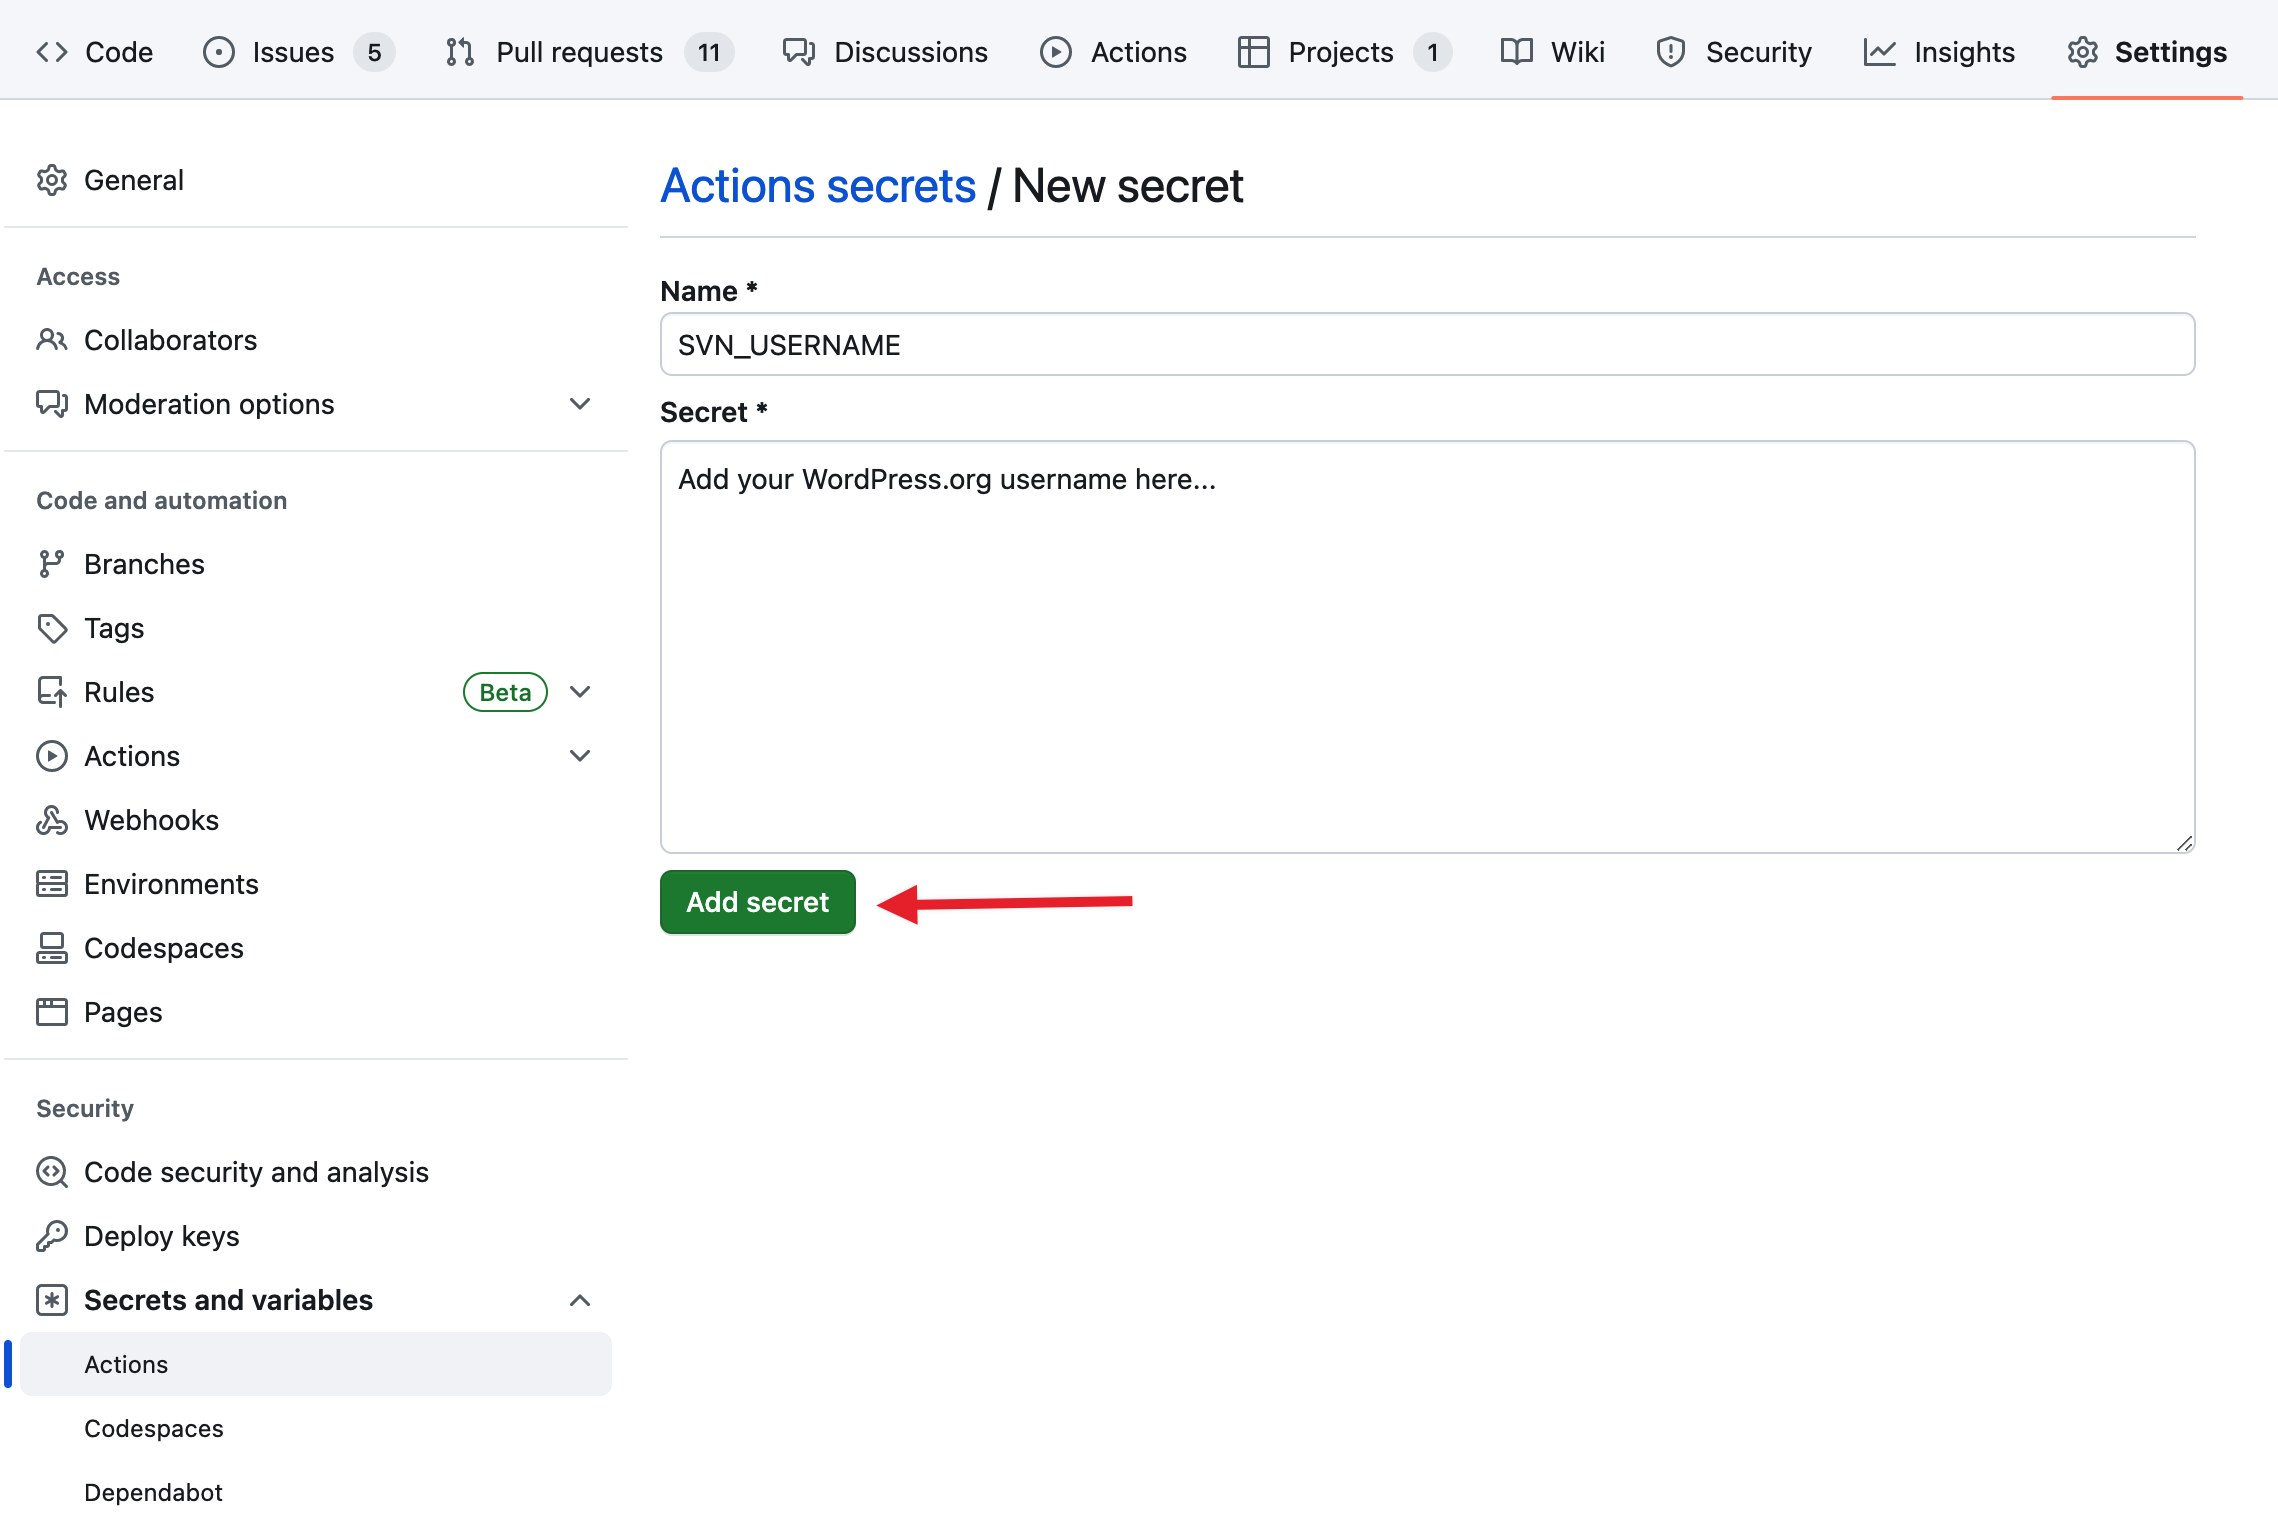
SLUG: ${{ secrets.PLUGIN_SLUG }}Step 3: Add the required Secrets to your repository
There are three secrets that the 10up/action-wordpress-plugin-deploy action requires:
- SVN_USERNAME
- SVN_PASSWORD
- PLUGIN_SLUG
Add these secrets to your repository so Github encrypts them when the action runs and starts outputting the log files.
You don’t want anyone with access to the repository to know what your WordPress.org credentials are!
- Navigate to your repository’s “Settings” tab
- click “Secrets and variables” in the sidebar
- then click “Actions”
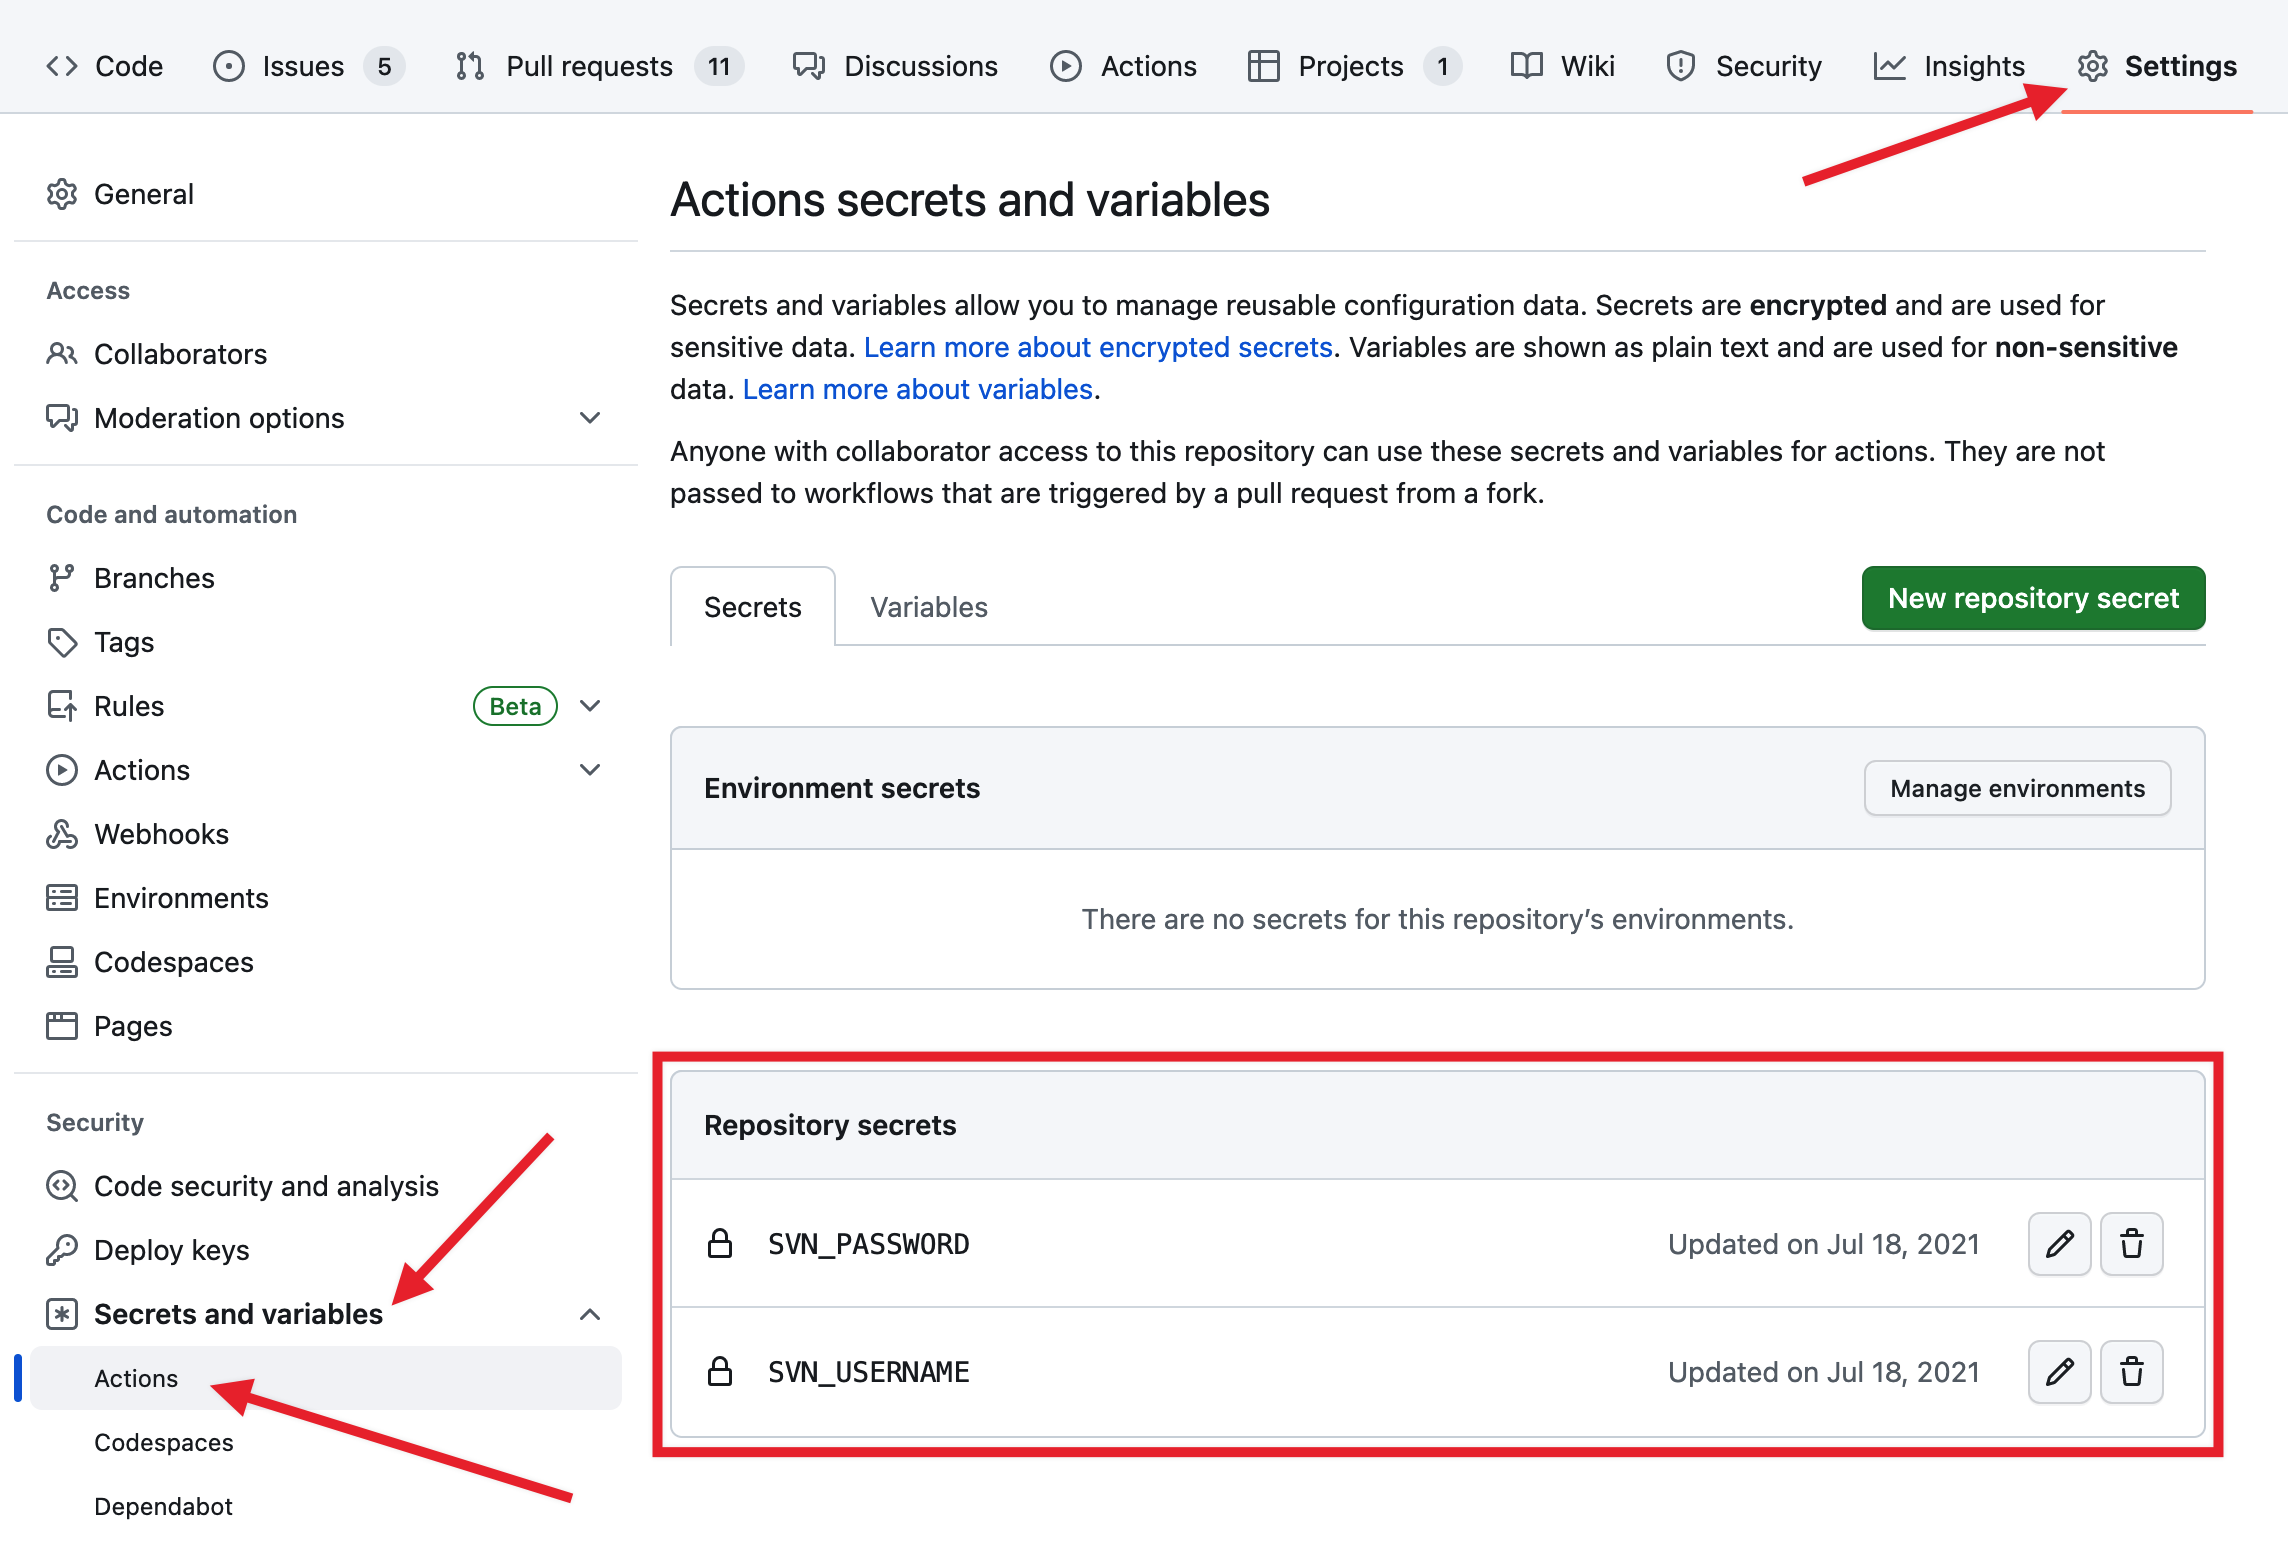
From here, you can add the required secrets for your action.
Step 4: Update the version of your plugin and test your deployment action
Now that your action is set up, update the version number in your plugin’s header and create a new release in Github:
1. Go to https://github.com/USERNAME/REPOSITORY/releases
2. Click “Draft a new release”
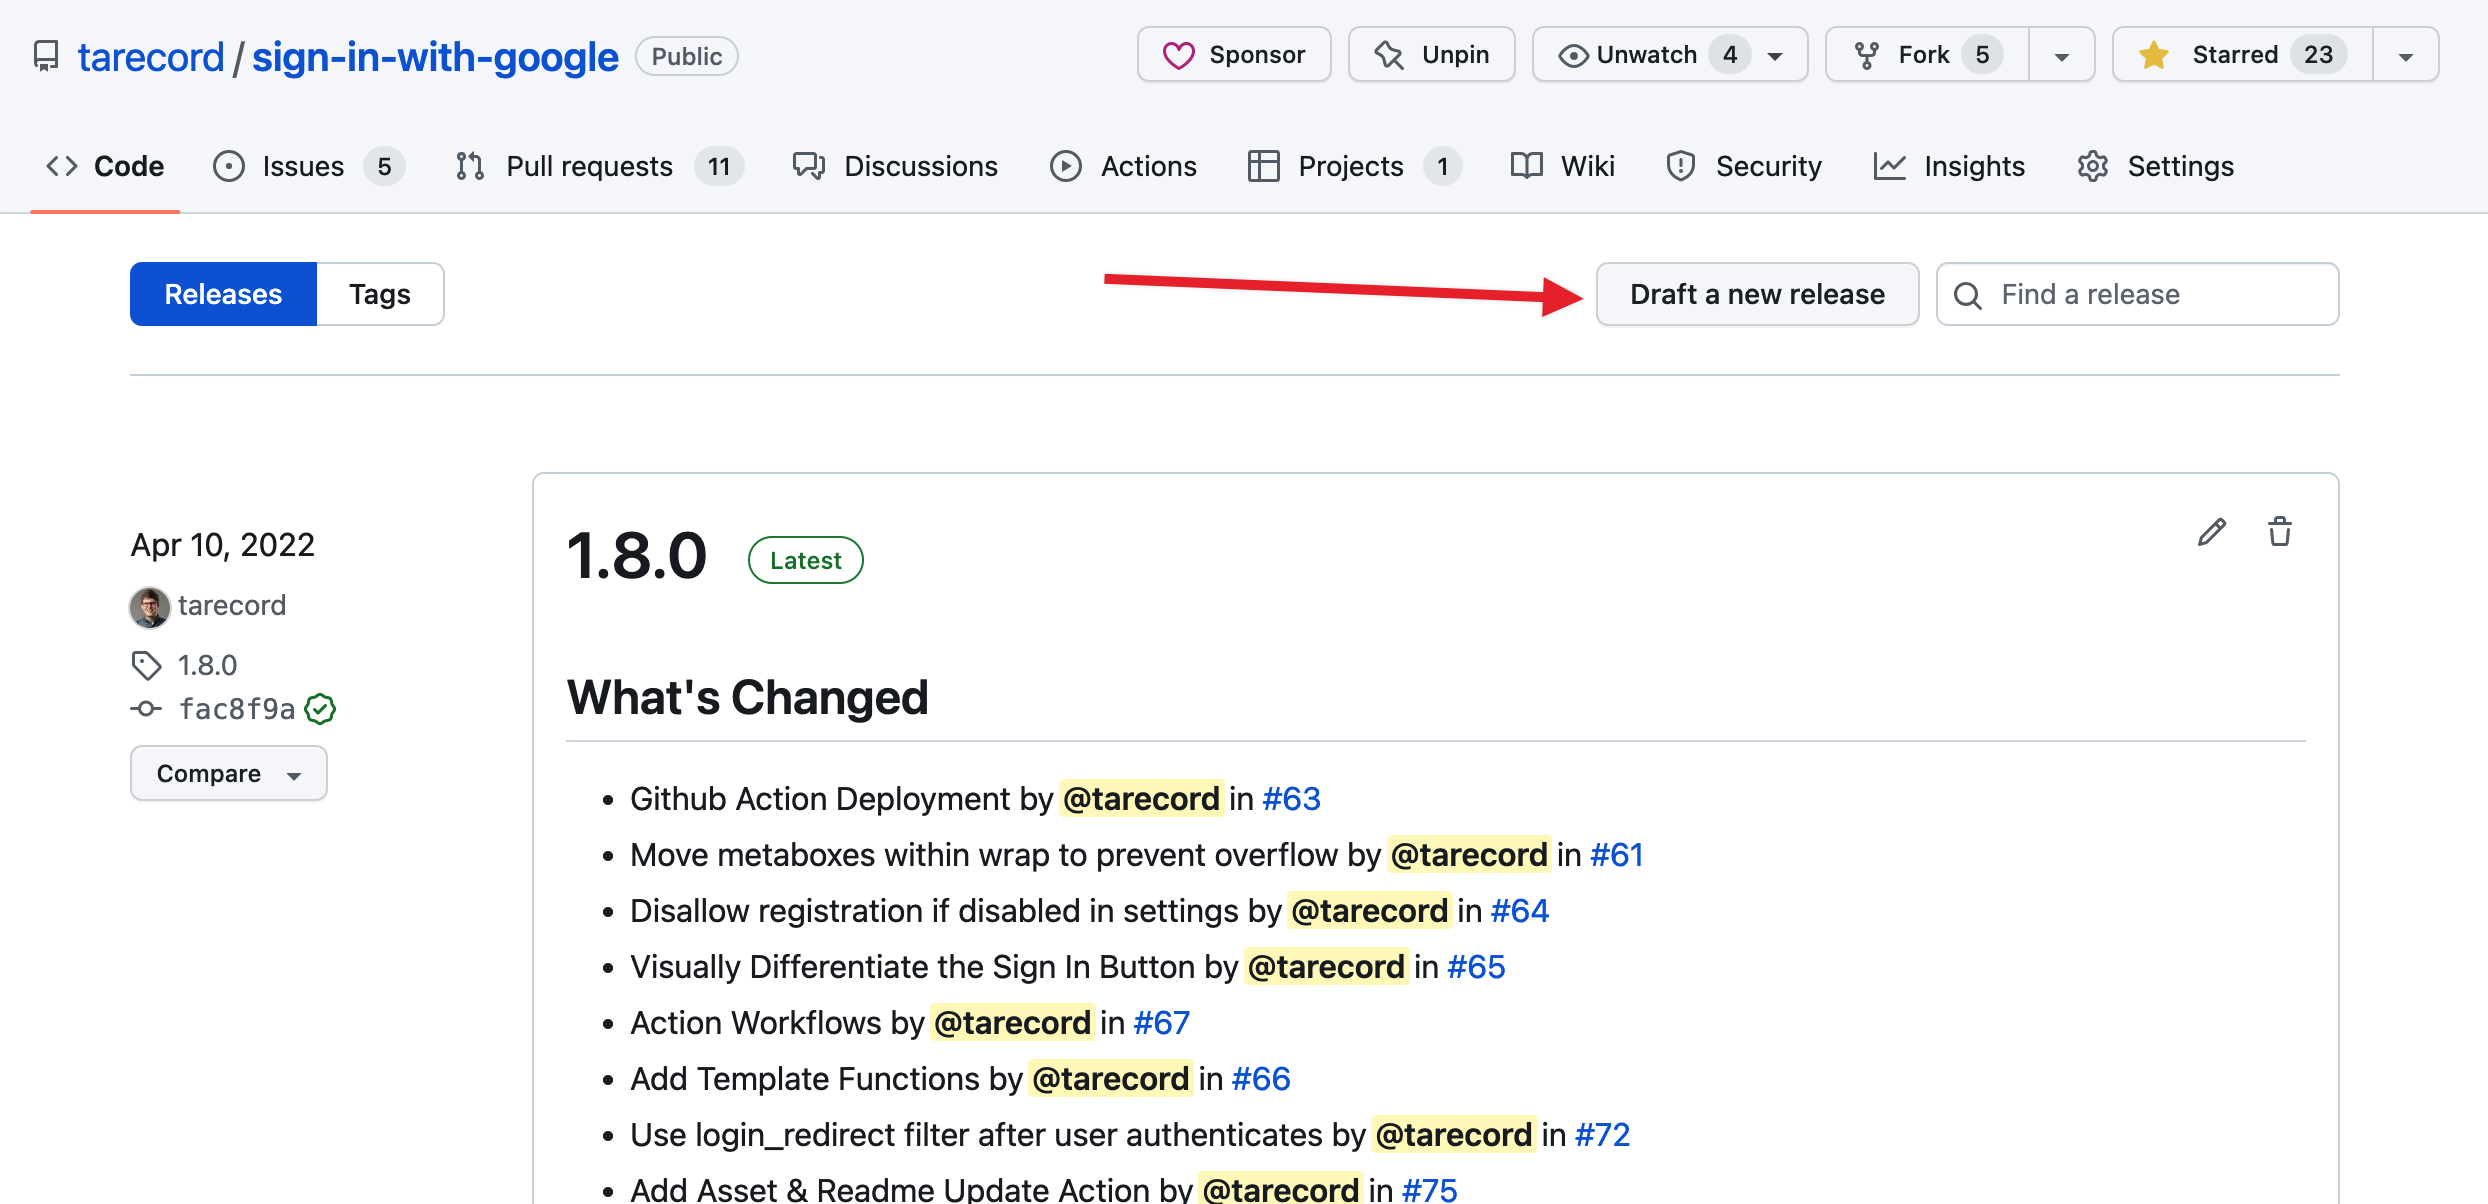
3. Use the version of your plugin as the tag and release title
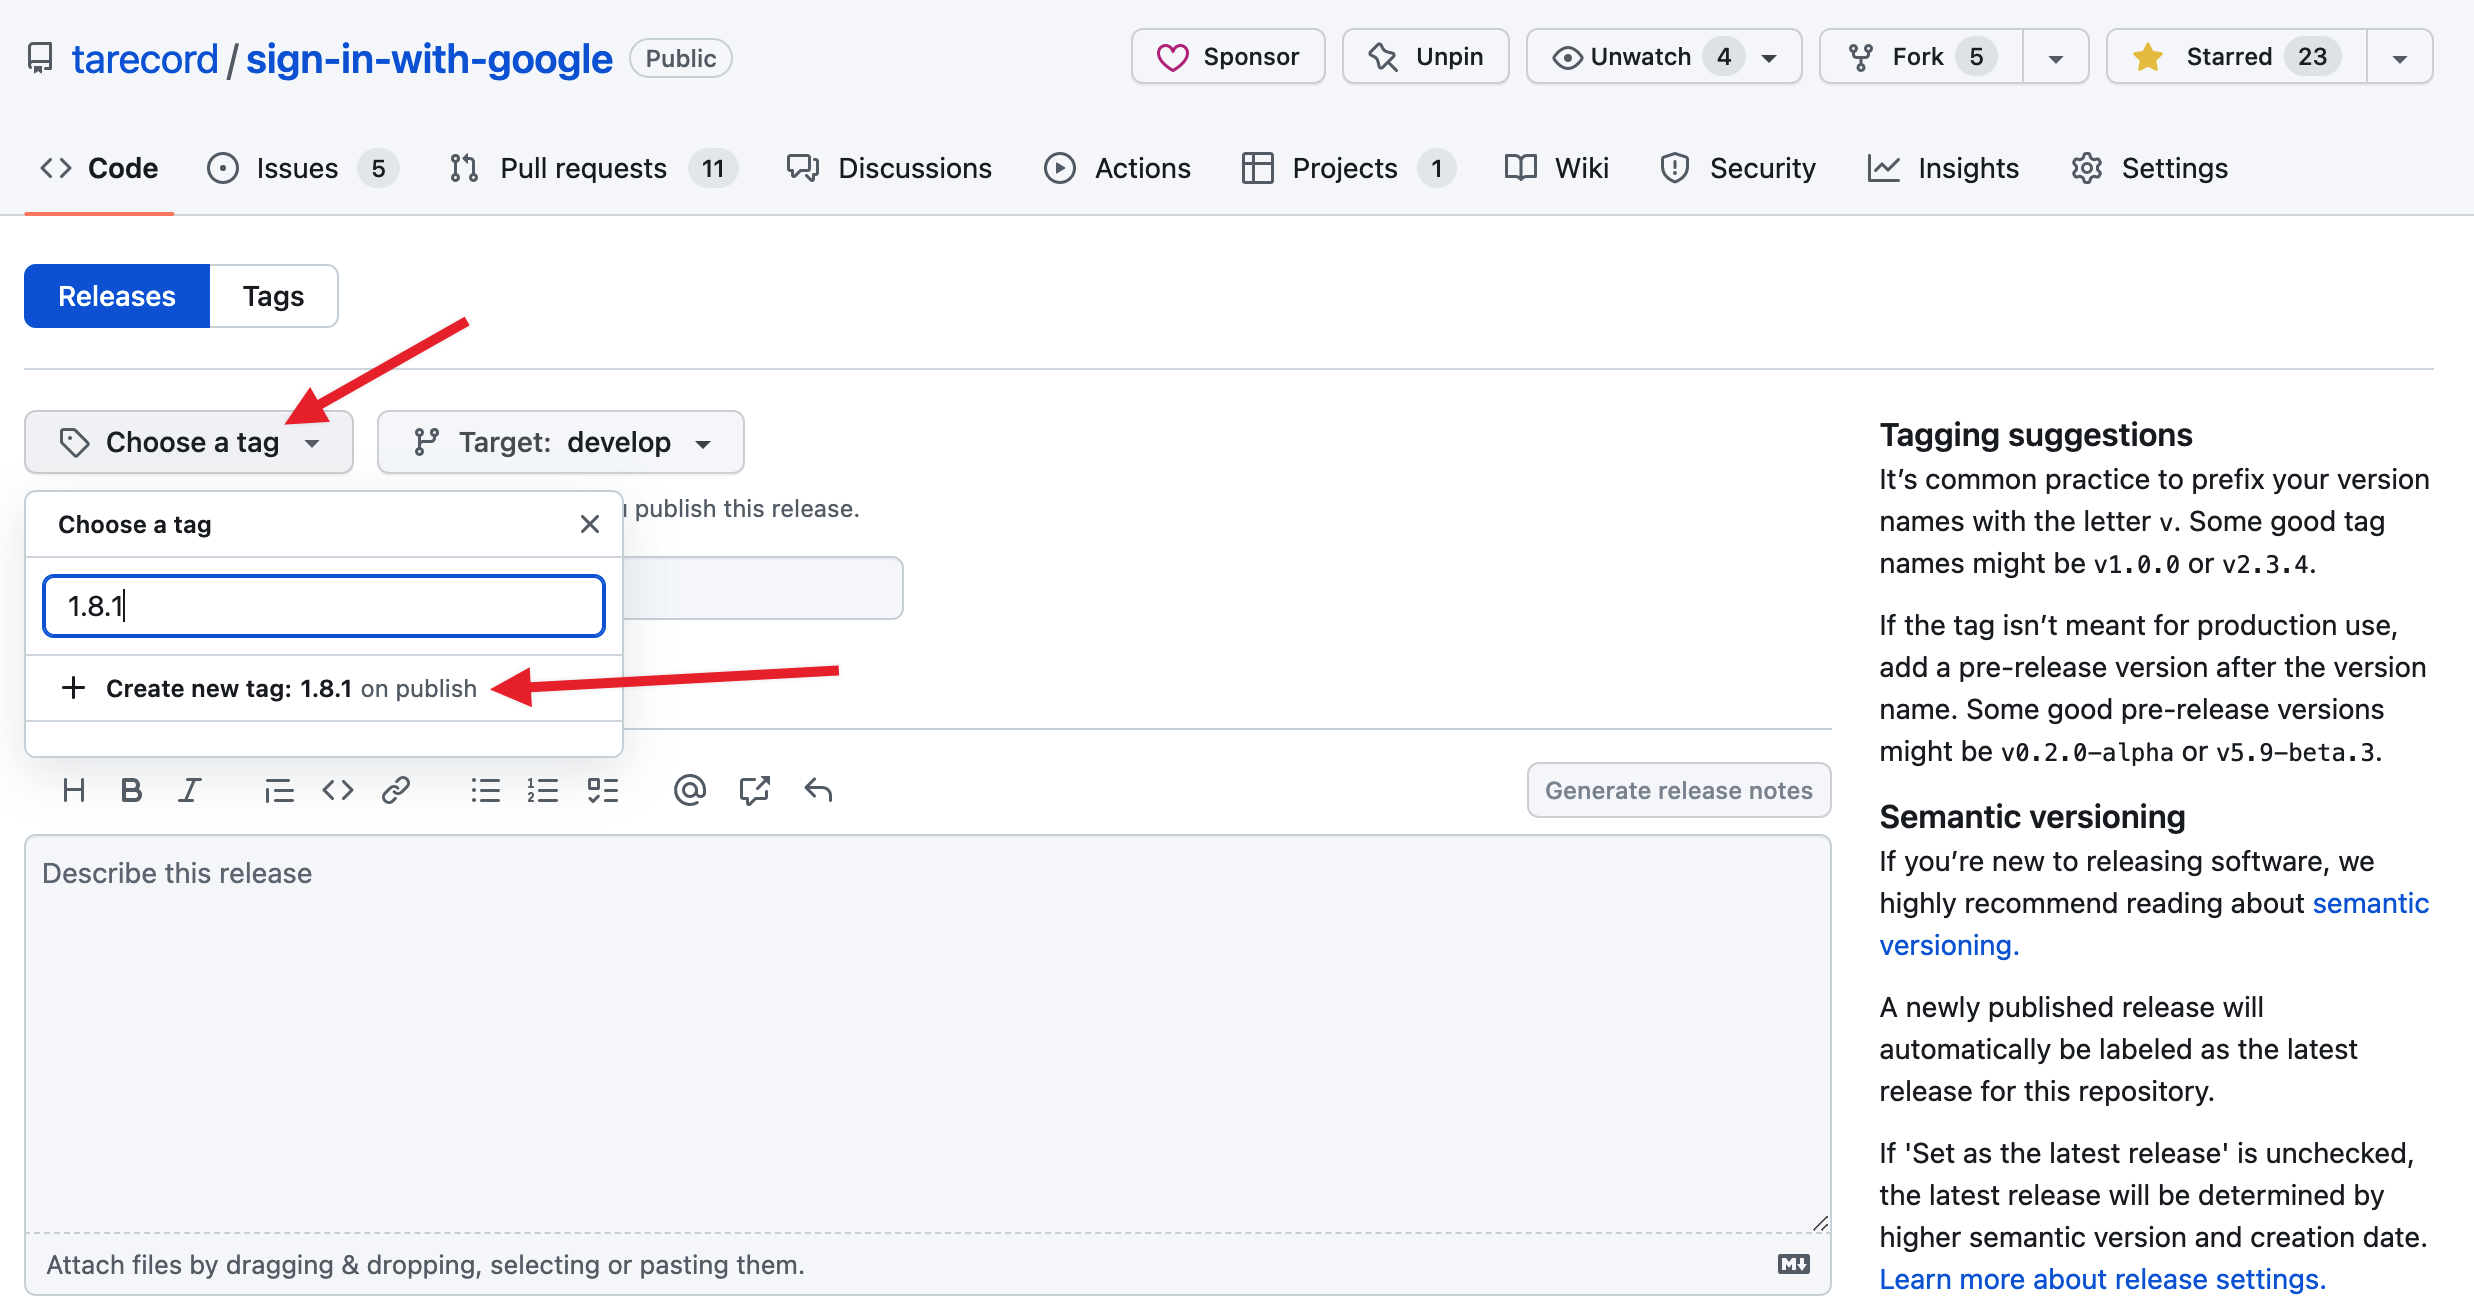
4. Add any release description you’d like
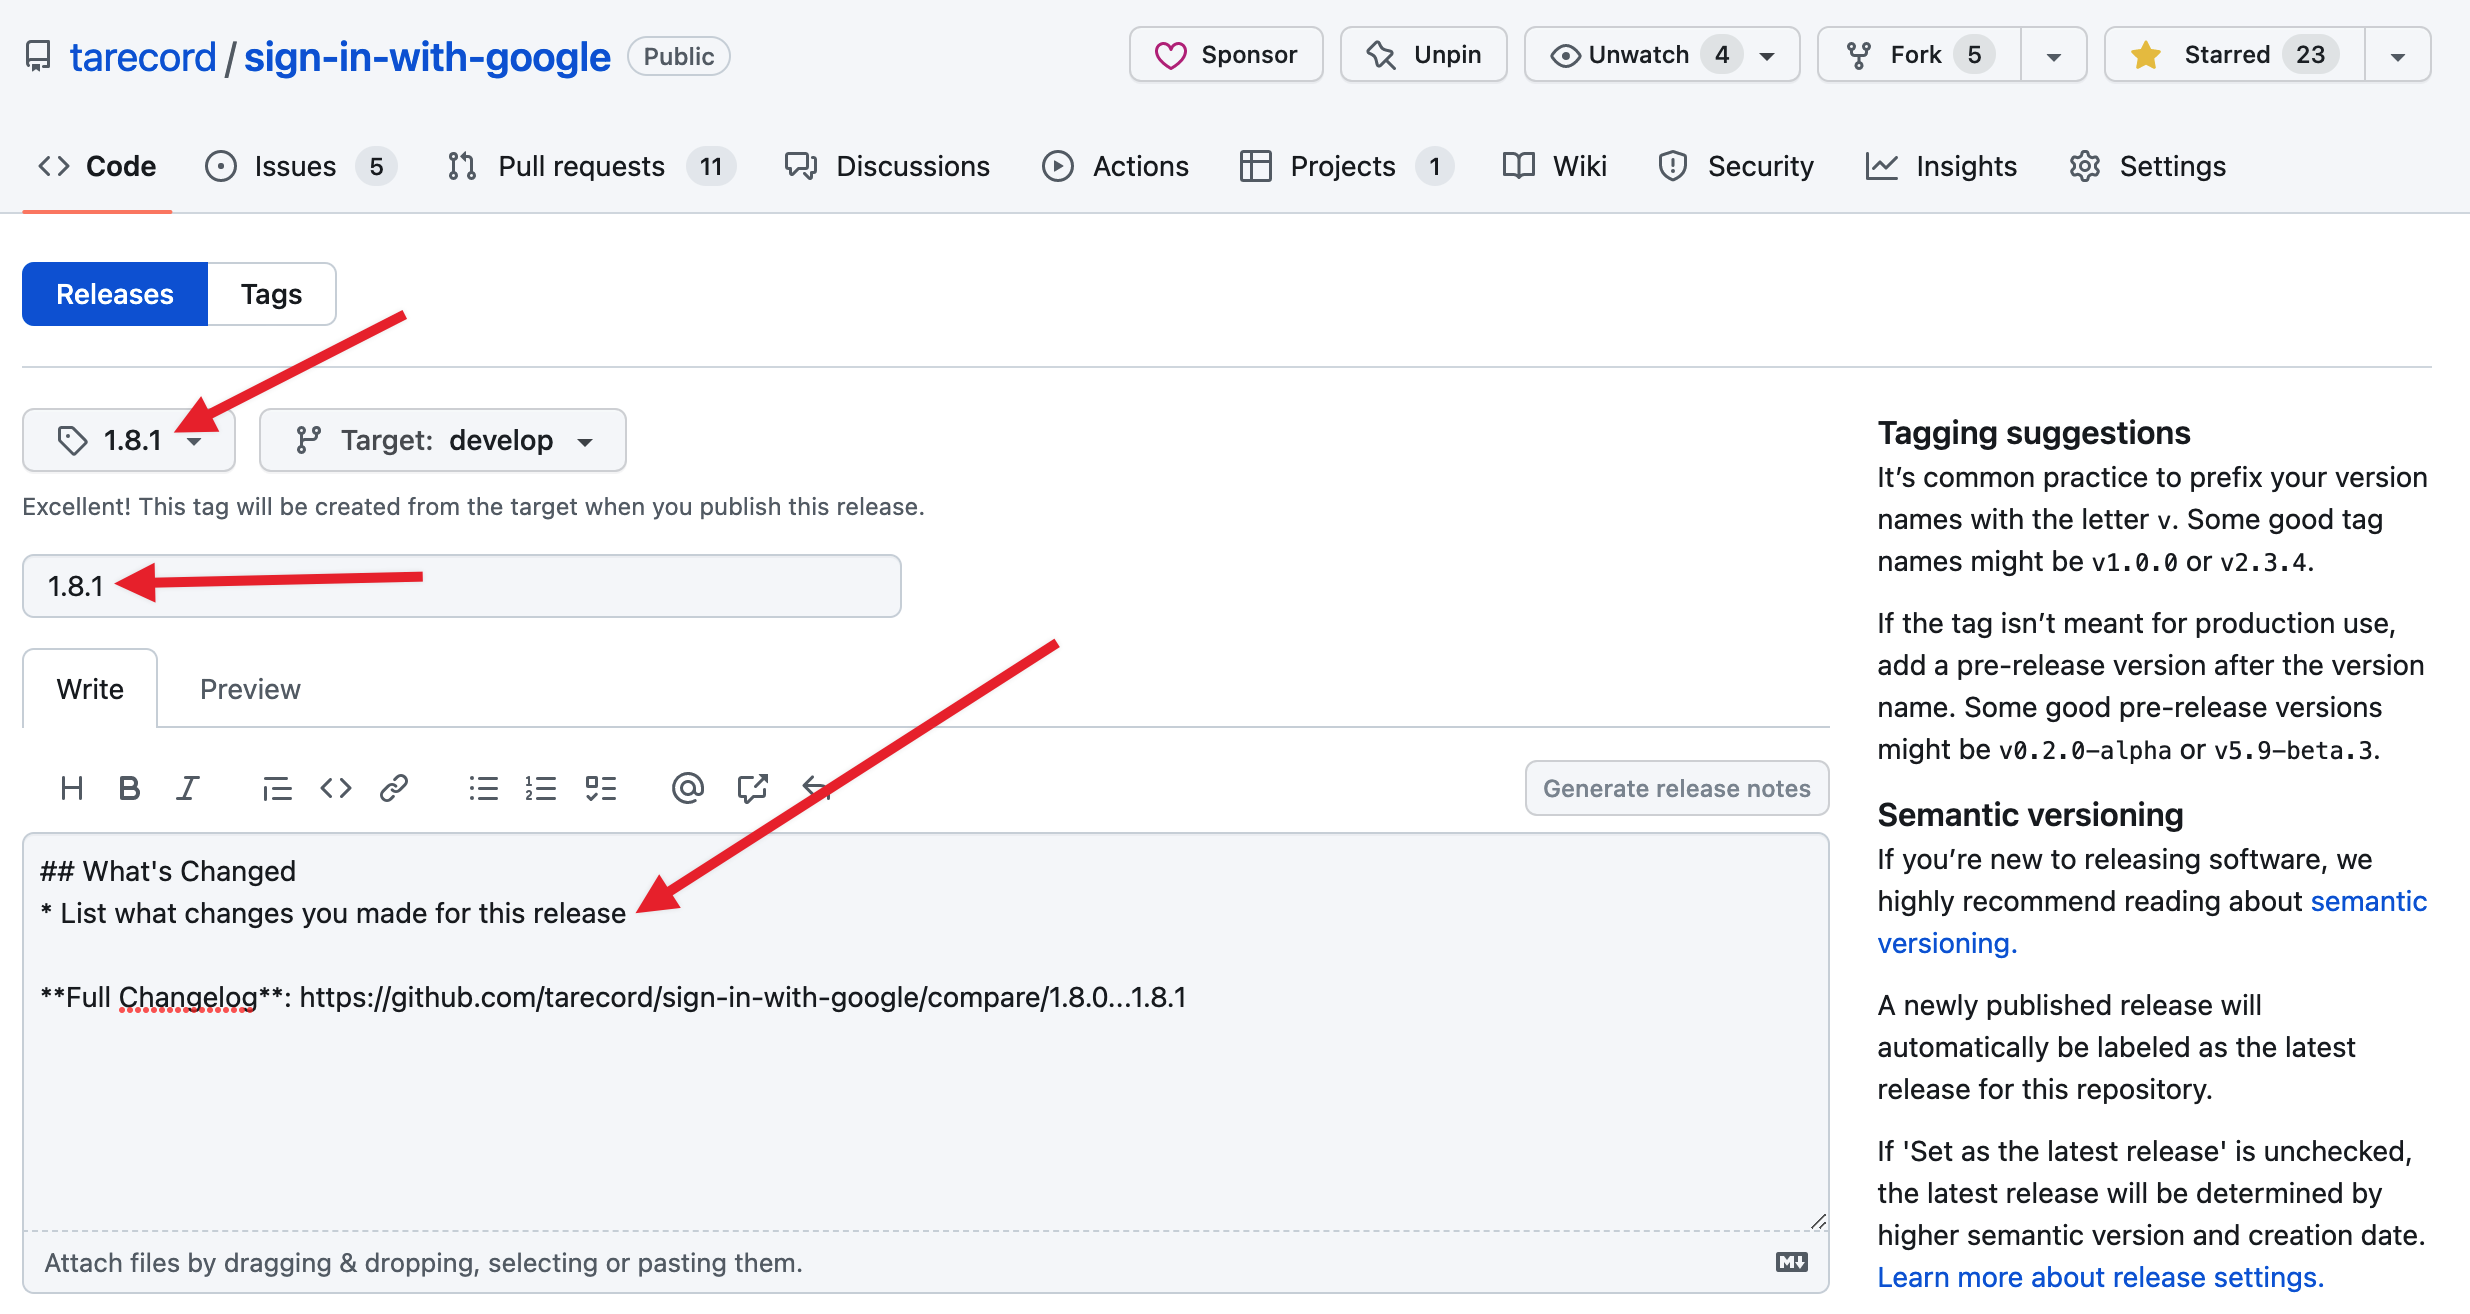
5. Click “Publish release” when ready
After you’ve published the release, go to your “Actions” tab and you should see a new running action.
From here, you can click to view the action log or wait for it to finish.
When the action finishes, you should get an email from WordPress.org that it deployed your plugin. Then, in a few minutes see your updated plugin in the WordPress plugin repository.
Here’s the whole action you can copy/paste into your plugin
By Adding this one action, you’ll save yourself hours next time you need to update your plugin.
I hope this helped you see how great Github actions are for your plugin development process.